- Check the batteries first, even if the remote lights up.
- Make sure the SAT button is pressed to control the receiver.
- Use the System Info button on the receiver to re-pair the remote.
- Run a 10-second power cycle on the Hopper to clear software glitches.

Why your DISH remote stopped responding
How to fix it in 5 minutes
Is your DISH TV remote not responding? Whether you need to replace your DISH Network remote batteries or re-pair your remote to your DISH Hopper, this guide has got you covered.
Start here: The 60-second DISH remote checklist
Before diving into detailed troubleshooting, run through these five quick checks:
If one of these doesn't fix it, the sections below break down your next steps.
Why won't my DISH remote work even with new batteries?
If your DISH TV remote not responding problem continues after installing new batteries, the batteries are still the first place to investigate.
Many people assume that if the remote lights up, the batteries must be working correctly. That's not always true. A remote requires enough voltage to transmit a signal to the receiver. Batteries can have enough remaining power to illuminate an LED while still falling below the voltage threshold needed to send commands.
When troubleshooting DISH Network remote batteries, check the following:
- Confirm battery polarity matches the markings inside the battery compartment.
- Remove and reinsert both batteries.
- Verify both batteries are the same brand and type.
- Check expiration dates on the battery packaging.
- Look for dirt or debris on the battery contact points.
- Avoid mixing old and new batteries.
Fresh, matching batteries remain the fastest fix for a DISH remote not working issue. Even recently installed batteries can be defective, partially drained from storage, or inserted incorrectly.
Why does my DISH remote turn the TV on but won't change channels?
If your remote powers on the television but won't change satellite channels, the most likely cause is mode confusion.
DISH remotes can control multiple devices, including your TV, receiver, DVD player, soundbar, and audio equipment. When the remote enters TV, AUX, or another device mode, it stops sending channel-change commands to the satellite receiver.
If a DISH remote is in the wrong mode, it won't control the receiver until the SAT button is selected.
The SAT button is one of the most overlooked troubleshooting options and often solves what appears to be a major remote failure.
Symptom | Correct Mode / Fix |
TV turns on, channels won't change | Press SAT |
Volume works, channel buttons don't | Press SAT |
Soundbar responds but receiver doesn't | Press SAT and retest |
Guide button doesn't work | Verify SAT mode |
Receiver ignores all commands | Press SAT, then re-pair if needed |
External devices can sometimes "hijack" the remote's focus. For example, if you've recently adjusted soundbar settings, the remote may still be communicating with the soundbar instead of the DISH receiver.
Whenever a “DISH remote stopped working” complaint involves channel controls, check the SAT button first.
How do I re-pair my DISH remote with the Hopper or Joey?
If pressing SAT doesn't help, re-pairing the remote is usually the next step.
The primary method for pairing a DISH remote is through the System Info screen on the Hopper or Joey receiver.
Important: Do not block the receiver's IR sensor during the pairing process. The receiver must be able to communicate with the remote while syncing.
Follow these steps:
- Locate the System Info button on the front panel of your Hopper or Joey receiver.
- Press the System Info button.
- Wait for the System Information screen to appear on your TV.
- On a 52.0 or 54.0 remote, press and hold the SAT button until all mode lights illuminate.
- Release the SAT button.
- Press the Back button.
- Press Record.
- Wait for the receiver to confirm successful pairing.
If multiple remotes are paired to the same receiver, a "ghost" remote may occasionally create conflicts. Re-pairing the active remote through the System Info screen often removes those communication issues and establishes a fresh connection.
When troubleshooting how to program your DISH Network remote to TV or receiver communication issues, the System Info screen is typically the gateway to resolving pairing problems.
The power cycle: Resetting your Hopper receiver
Sometimes the remote isn't the problem at all.
The receiver itself can experience temporary software freezes that make it appear as though the remote has stopped working. In these situations, a receiver power cycle is often more effective than resetting the remote.
Quick reset guide
- Unplug the Hopper's power cord (the cord with the red tag attached).
- Leave the receiver disconnected for at least 10 seconds.
- Plug the receiver back in and allow it to fully restart.
This process is called a power cycle. Unlike a remote reset, a receiver power cycle clears temporary software data and internal cache files that may be interfering with command processing.
During reboot, you'll typically see startup screens followed by an "Acquiring Signal" message. Allow the process to finish completely before testing the remote again.
Many instances of a DISH TV remote not responding are actually caused by software freezes inside the Hopper rather than a malfunctioning remote.
Programming your DISH remote to control the TV
Many customers who search “How to program DISH remote to TV?”, “How to program a DISH remote to TV?”, or “How to program DISH Network remote to TV?” are trying to set up TV power and volume controls.
Fortunately, Hopper systems include a built-in Pairing Wizard that simplifies the process.
To program your remote:
- Press the Home button twice.
- Select Settings.
- Choose Remote Control.
- Select TV.
- Choose Pairing Wizard.
- Select your TV brand.
- Follow the on-screen instructions.
- Test power, volume, and mute functions.
The Pairing Wizard is generally faster and more reliable than manual code entry because it automatically identifies compatible control codes.
Common TV brand issues
Samsung TVs
- Some models require multiple code attempts before power control works properly.
- Test both power and volume after pairing.
LG TVs
- Volume may work immediately while power requires a second pairing attempt.
- Run the Pairing Wizard again if only partial functionality is available.
Vizio TVs
- Ensure the TV is powered on during setup.
- Repeat the pairing process if commands respond inconsistently.
If volume controls work but power doesn't, rerun the Pairing Wizard before assuming the remote has failed. In many cases, the remote has only partially completed the setup process.
Troubleshooting the 52.0 remote and advanced models
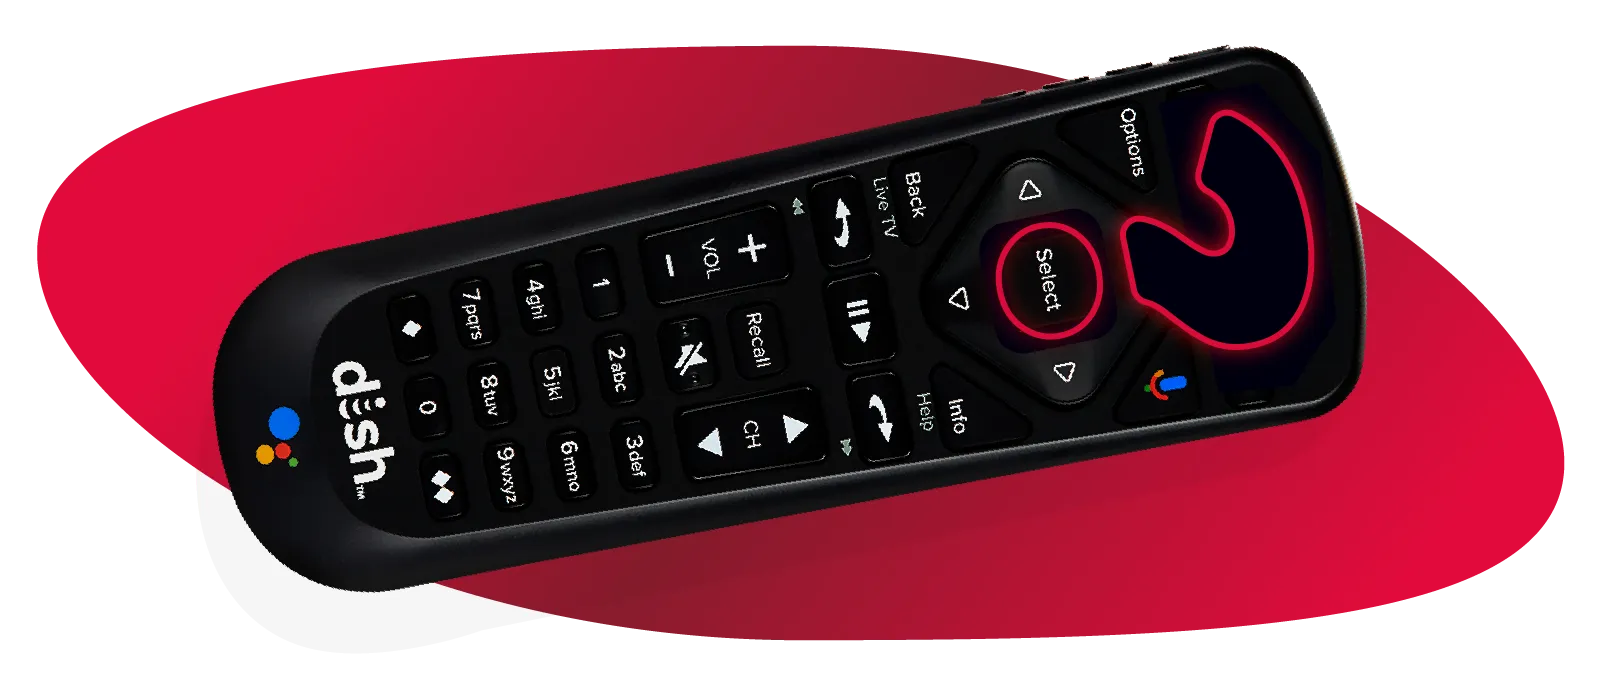
The DISH 52.0 remote is one of the most common remotes used with Hopper systems.
You can identify the 52.0 by its distinctive button layout and touchpad design. Unlike older remotes, the 52.0 uses both IR (infrared) and UHF (radio frequency) communication. In simple terms, IR requires a direct line of sight, while UHF can work through walls and cabinets.
Because the 52.0 uses radio-frequency communication, it can occasionally experience interference from nearby electronics.
Common 52.0 remote issues include:
- Stuck buttons
- Intermittent response
- Delayed commands
- Pairing failures
- Signal interference from nearby devices
Pro Tip: If you've misplaced your remote, use the Hopper's built-in Remote Locator feature. Activating the locator causes the paired remote to emit an audible tone, making it easier to find between couch cushions or in another room.
If you've replaced the batteries, verified SAT mode, re-paired the remote, and completed a receiver power cycle, the remote hardware itself may be failing.
At that point, requesting a replacement is often the most efficient solution.
When is it time to upgrade your DISH setup?
Most remote issues are fixable. Fresh DISH remote batteries, proper pairing, SAT mode verification, and a receiver power cycle solve the majority of problems.
That said, hardware aging is real. Older remotes and legacy receivers can become less reliable over time, especially compared to modern Hopper Smart DVR systems. Since DISH provides the Hopper hardware that these remotes control, upgrading outdated equipment can improve responsiveness, reliability, and overall viewing experience.
Modern Hopper systems offer advanced DVR capabilities, improved remote functionality, and dependable performance backed by DISH service.
If your equipment is several generations old and troubleshooting no longer resolves recurring problems, it may be worth exploring current DISH packages.
DISH remote FAQs
Why is my DISH remote blinking but not working?
A blinking remote light often indicates a battery-related issue, even when the batteries appear new. The remote may have enough power to illuminate the LED but not enough voltage to transmit commands to the receiver. Replacing both batteries with fresh, matching batteries and verifying proper installation usually resolves the issue.
How do I know if my DISH remote is in the right mode?
Press the SAT button and then try changing channels. If the remote was previously set to TV, AUX, or another device mode, it may control power or volume functions without communicating with the receiver. SAT mode ensures channel, guide, and DVR commands are sent to your DISH equipment.
Can I use my phone instead of my DISH remote?
In many cases, you can use your phone instead of your DISH remote. The DISH Anywhere app provides remote-control functionality for compatible receivers and allows you to manage recordings, browse programming, and control certain receiver functions from a smartphone or tablet. Compatibility depends on your receiver model and account setup.
How do I get a replacement DISH remote?
If troubleshooting steps such as battery replacement, re-pairing, SAT mode verification, and receiver power cycling do not restore functionality, contact DISH support. They can help determine whether the issue is hardware-related and assist with obtaining a compatible replacement remote for your receiver.